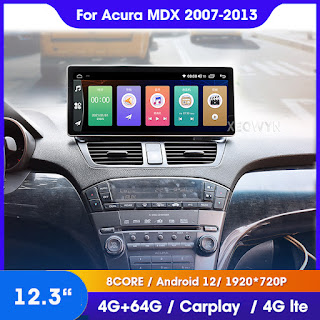
How to Install Acura TL Tesla Screen #naivtech
After you purchased an aftermarket Android system for your Acura TL (2004-2008). Here's a detailed roadmap for installing it:
if you donot have this system, please buy from our store
1. **Preparation**
- **Gather Tools**: Collect necessary tools such as a Phillips and flathead screwdrivers, panel removal tools, wire strippers, pliers, and possibly a soldering iron.
- **Read Instructions**: Carefully read the installation manual that came with your aftermarket Android system, paying attention to any model-specific instructions.
- **Backup Settings**: While this isn't always possible with a stock system, check if there's anything important you need to save before disconnecting the original stereo.
2. **Disassembly**
- **Remove Dashboard Trim**: Start by removing the center console and dashboard trim pieces surrounding the radio. This typically involves gently prying off plastic covers without damaging them.
- **Unplug Factory Stereo**: Once the trim is removed, unplug the wiring harness from the stock stereo. Also, detach any connectors for the antenna, aux input, and possibly the steering wheel control interface.
3. **Wiring Connection**
- **Connect New Harness**: Match the wires from the aftermarket Android head unit's wiring harness to the corresponding wires from the Acura TL harness, following the color-coding and diagrams provided.
- **Power Connections**: Connect the constant, ignition, and accessory power wires to their respective sources as specified in the instructions. Don't forget ground connection.
- **Additional Features**: If your Android system supports steering wheel controls or a backup camera, connect those interfaces according to the manual.
4. **Install the Android Head Unit**
- **Mounting**: Place the new Android unit into the dashboard opening, ensuring it fits snugly and securely. Use brackets or mounting hardware provided.
- **Secure Unit**: Fasten the Android head unit in place using screws or clips provided.
5. **Calibration and Configuration**
- **Reinstall Panels**: Replace the dashboard panels and test the fit and finish.
- **Initial Setup**: Turn on the new Android system and go through the initial setup process which may include language selection, Wi-Fi setup, and Google account linking.
- **Test Features**: Test all functionalities like audio output, GPS navigation, Bluetooth connectivity, and steering wheel controls (if applicable).
- **Setting Password** 3368
6. **Fine-Tuning and Testing**
- **Fine-tune Settings**: Adjust settings to your preferences, including display brightness, volume levels, and home screen layout.
- **On-Road Testing**: Take the car for a drive to thoroughly test the Android system's performance during actual driving conditions, checking for issues with signal strength, GPS accuracy, and system stability.
If at any point you feel unsure about the installation process, consider consulting a professional installer who can help ensure the job is done safely and efficiently.


Comments
Post a Comment